What Color Grout to Use With Gray Floor Tile
If you're looking to add white subway tile with gray grout to a kitchen, bathroom, or other space in your home, this post's for you! I'm sharing my tips for testing grout colors and my favorite gray grouts!
Since sharing the results of our kitchen renovation (you can see all of the photos and details of our new kitchen {here}), I've had so many people asking about the gray grout that I used that I realized I wasn't the only one who struggled with which gray grout would work best with my kitchen's white subway tile. "Struggle" is kind of laughable for something as silly as choosing a grout color but your grout choice can make a night and day difference in your final tile job so I wanted to make sure not to mess this choice up! I was surprised not to find hardly any "real life" images of white subway tile with gray grout where the grout color was given so I decided to share how I chose my grout along with some pics of my favorite gray grouts combined with white subway tile.
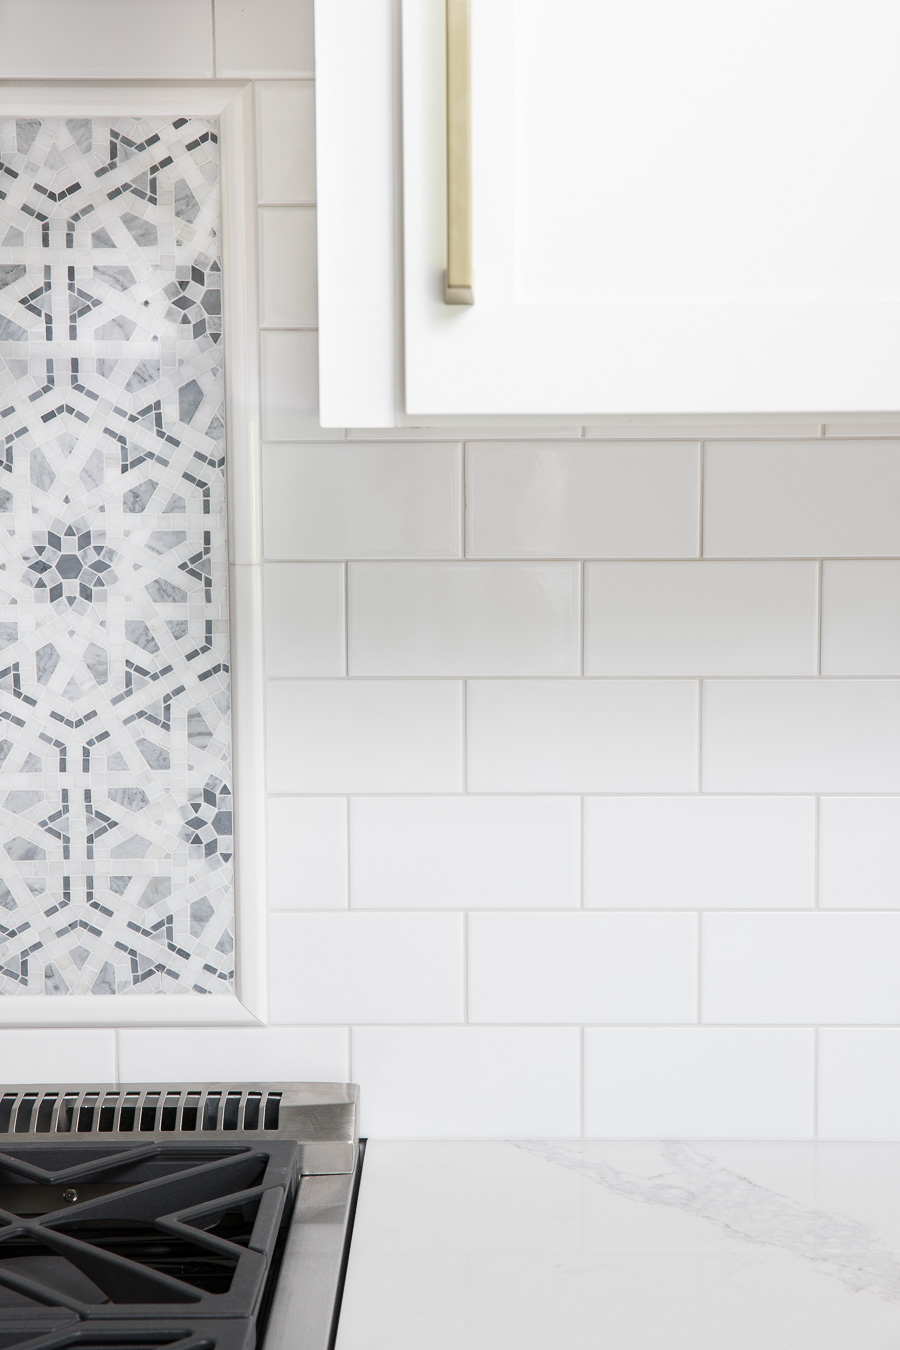
First off, here's a look at the gray grout I chose – I went with a light gray option called Frost. This pic shows how the white subway tile and gray grout look in both shadowed spaces (underneath the upper cabinet and to the left of it) and in a more sunny spot close to the countertop:
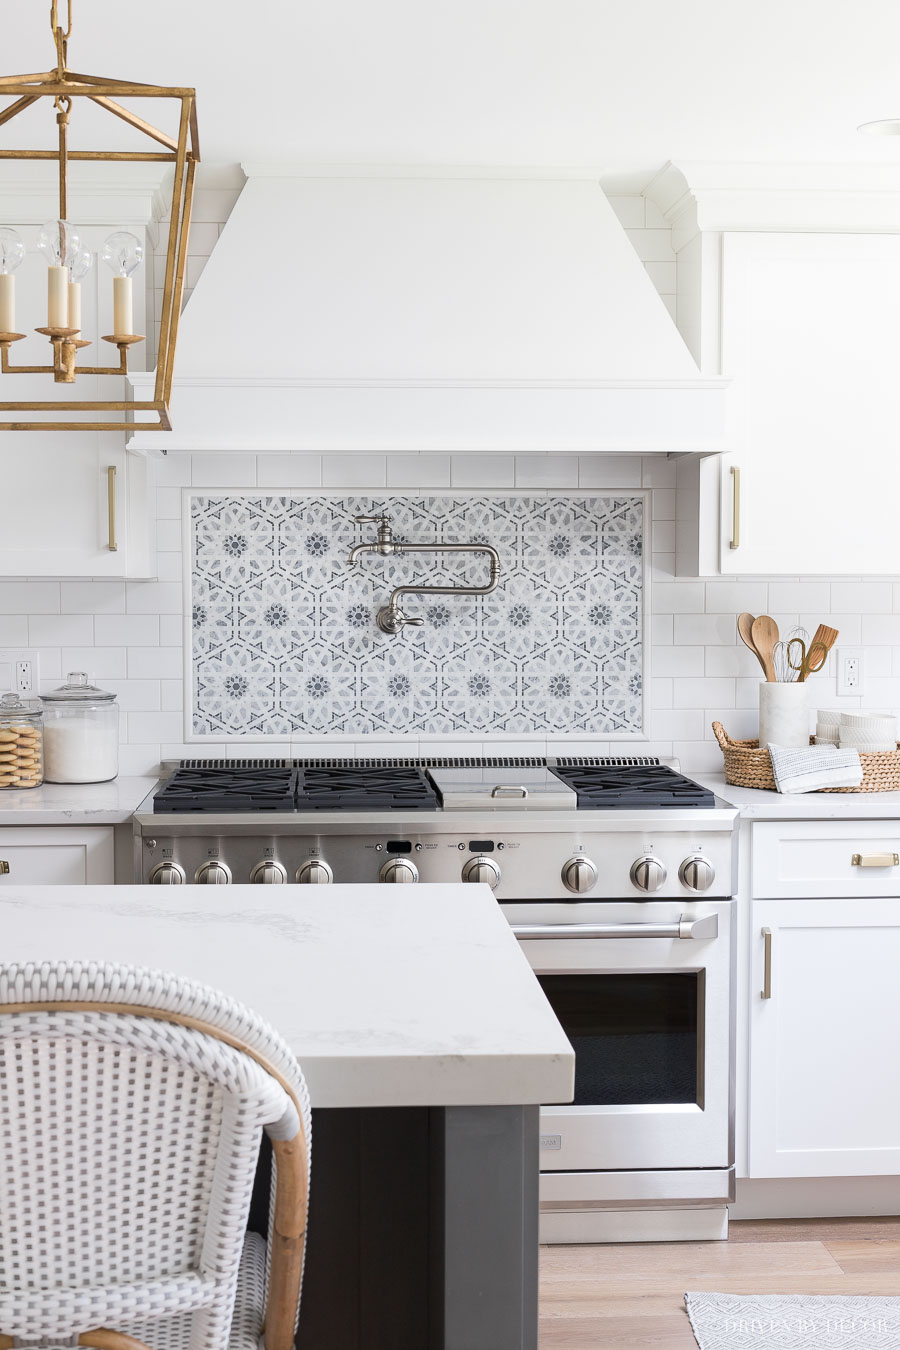
I used the same grout for the Walker Zanger Villa D Oro mosaic behind my kitchen range:
I wish I could say that my decision was as easy as looking at a color chart and saying "that's the one" but oh my gosh, there are SO MANY gray grout options and since I wanted to choose the best one for my space, I did some legwork to make sure I got it right. Here are some things that I found helpful to do (affiliate links included in post – full disclosure available {here}):
Narrow Down Your Options with Grout Color Sticks and By Walking the Tile Aisles
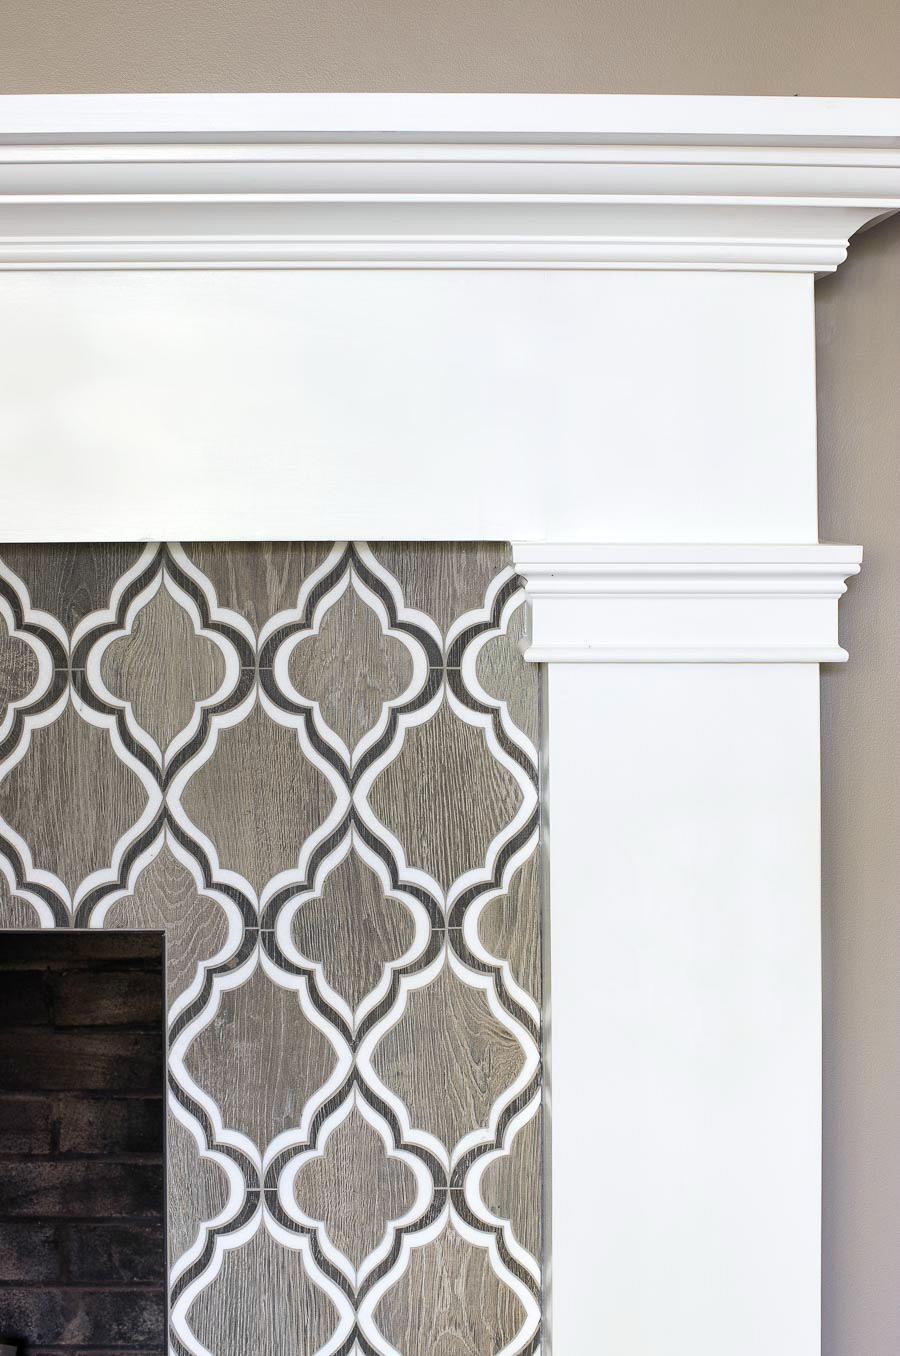
Start off by talking to your tiler (unless you're DIYing it!) about his/her recommendations and viewing the grout sample sticks that they typically have. The sample sticks are usually plastic replicas and not the true grout so while I've found them to be helpful in narrowing down my options, they're not always helpful in making final decisions since the real grout can differ a bit in appearance. Tilers see all different grout and tile combinations so they have valuable experience to add to your decision but also remember that your taste might not be exactly the same as theirs – my tiler was adamant about the grout color that would work best with my fireplace tile but I went with something different (Polyblend Natural Gray) and am 100% happy with my decision.
So get their input but make sure your final decision is what YOU will like best, not them. After narrowing it down to a few options, walk the aisles of stores that showcase grouted tile – I walked around Lowe's where they show all sorts of different tiles with different grouts (and the grout colors are labeled!) to see some "real life" samples. Just be aware that the same grout will look quite different depending upon the color of tile surrounding it.
Make Sample Boards
I was able to narrow my grout choice down to two gray grout options but hadn't ruled out the possibility of just using white grout either so I made sample boards with all three grout options (I also made samples boards of two other grays I liked so I could share them with you!). Luckily subway tile is inexpensive so I made sample boards with full tiles but if your tile is more pricey, you could cut tiles in half and grout in between them so you don't use as many (an inexpensive tile cutter like {this} works well for that). The grout itself isn't exactly cheap, but spending $50 on grout now to get it right is well worth it in my opinion – it's a drop in the bucket compared to the cost of what you put into the rest of a kitchen reno! Choose sanded or unsanded grout depending upon the width you choose for your grout lines – mine were going to be 1/16″ (the most narrow you typically go) so that meant unsanded grout. Here's how I made my sample boards:
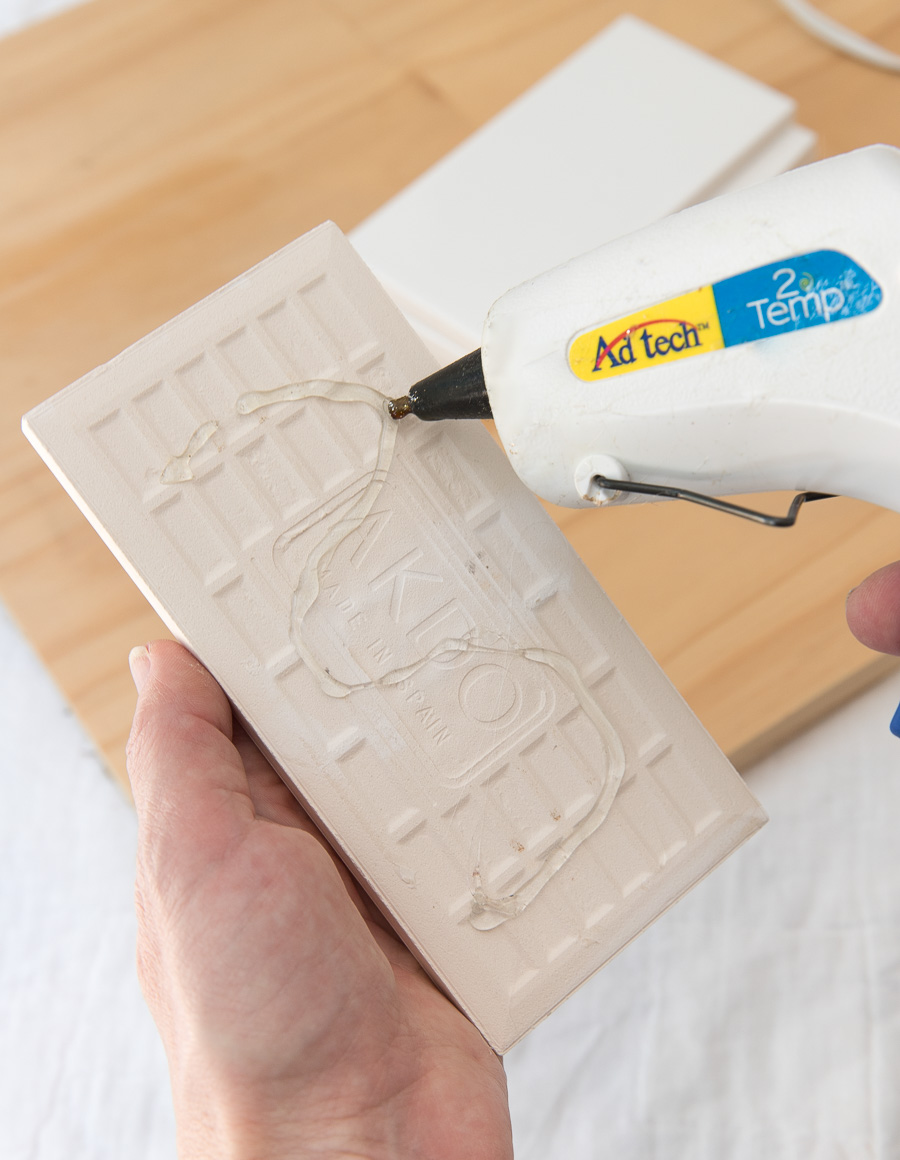
Use a Glue Gun to Glue Your Tiles on a Board
I snagged a plywood remnant from our renovation and used {this glue gun} to glue my tiles onto the board. You could use a different type of adhesive including the mastic adhesive used for tile or liquid nails, but the glue gun dries instantly so you can make your sample board quickly. Just be sure to put each tile in place on your board immediately after you put the hot glue on the back before it dries!
I glued down four tiles for each sample. If you have tile spacers, you can use them to get the same distance between your tiles as you'll have on your walls (mine are 1/16″ spacers like {these}) but they're not worth buying just for the sample boards – you can do the same thing with a ruler if you don't have a tiler to snag a few from.
Mix Up Your Grout Using the Directions on the Bag
You can buy premixed grout but since the bagged grout is cheaper, I went with that. Using a disposable bowl and plastic spoon, I poured some of the grout mix into the bowl and added a little bit of water at a time until it got to the right consistency (you want it well blended but not runny). Read the directions on the grout bag – let it sit for a few minutes after mixing if the directions state to do that like mine did. Then trowel it onto your tile, pressing it into the gaps. I happened to have a little trowel but a putty knife would work just fine for this too!
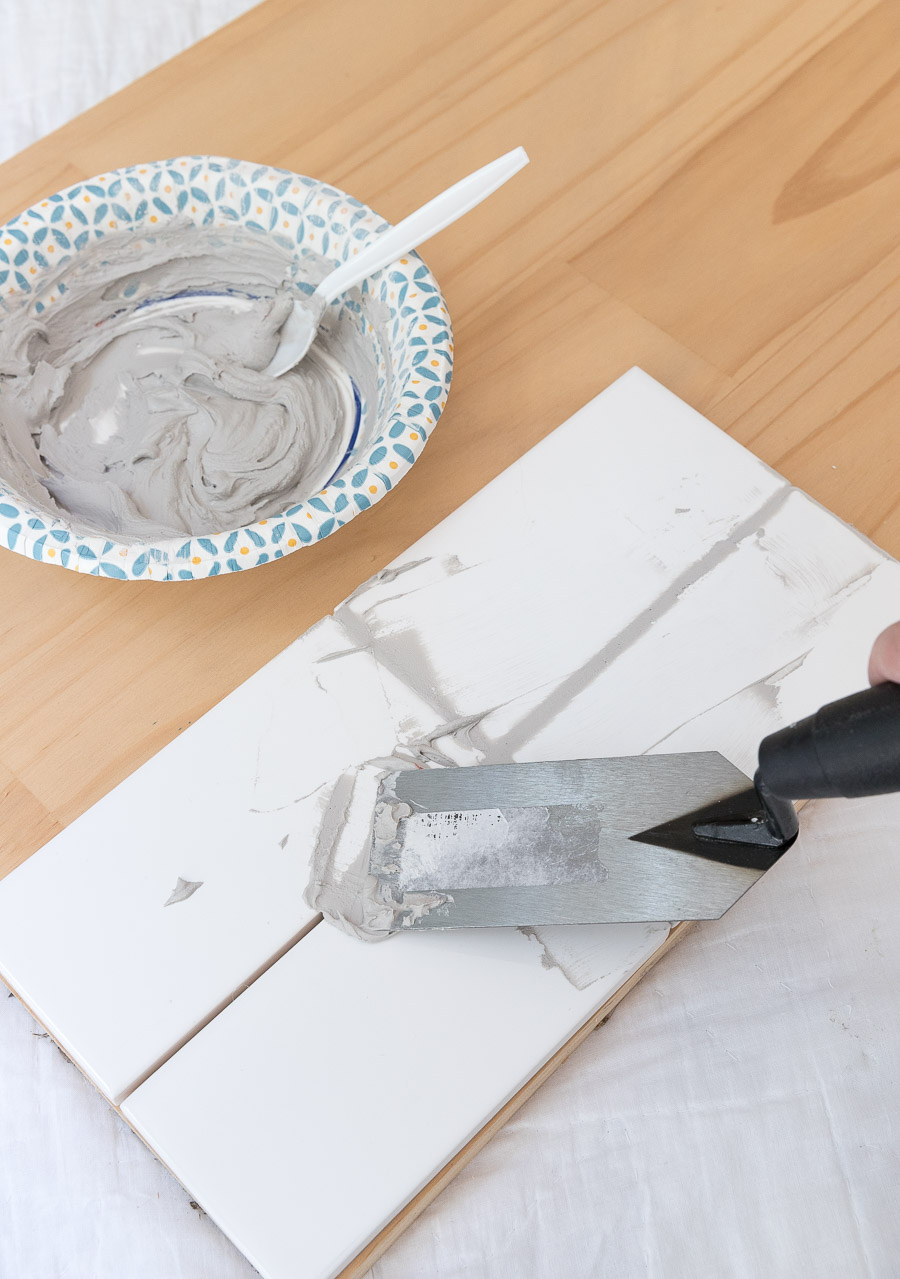
Once you're done, remove the excess with your trowel/putty knife (no need to get it all – just the bulk of it!) and let it sit for a several minutes according to your grout instructions.
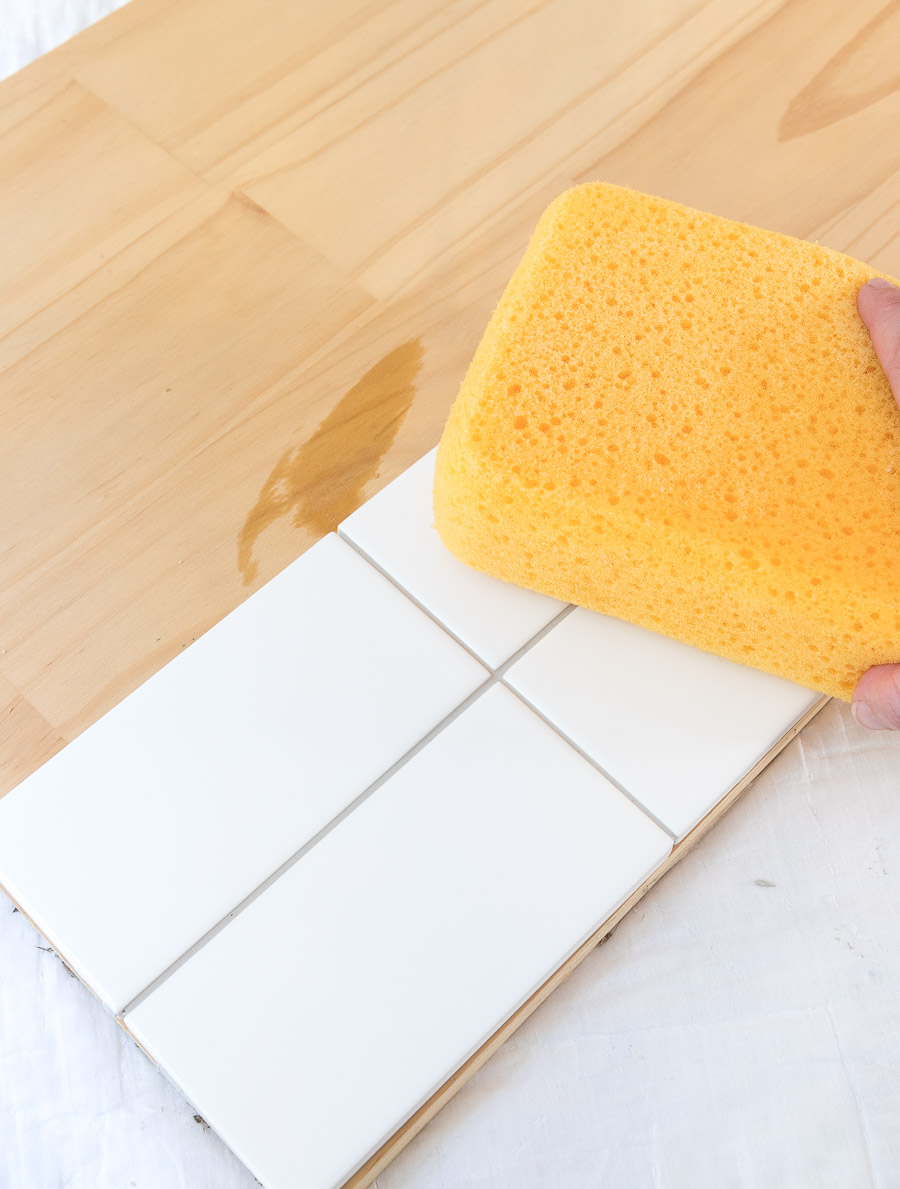
Use a Damp Sponge to Clean the Tile and Get Smooth Grout Lines
After you've let it sit for the time recommended on your grout bag, use a slightly damp sponge (wring out all excess water) to clean off your tiles and wipe over your grout lines to remove excess and make them smooth. You can also just use a paper towel for this!
Let it Dry
This last step is huge. The color will change quite a bit as it dries (it will lighten up) so don't make any decisions about grout color until it's totally dry. The time it will take to dry depends on the grout width but even the narrower width grout should dry overnight before you use it to make a color decision. The image above shows what Frost grout looked like wet and the image below (Frost is at the top) shows how much lighter it was when it dried:
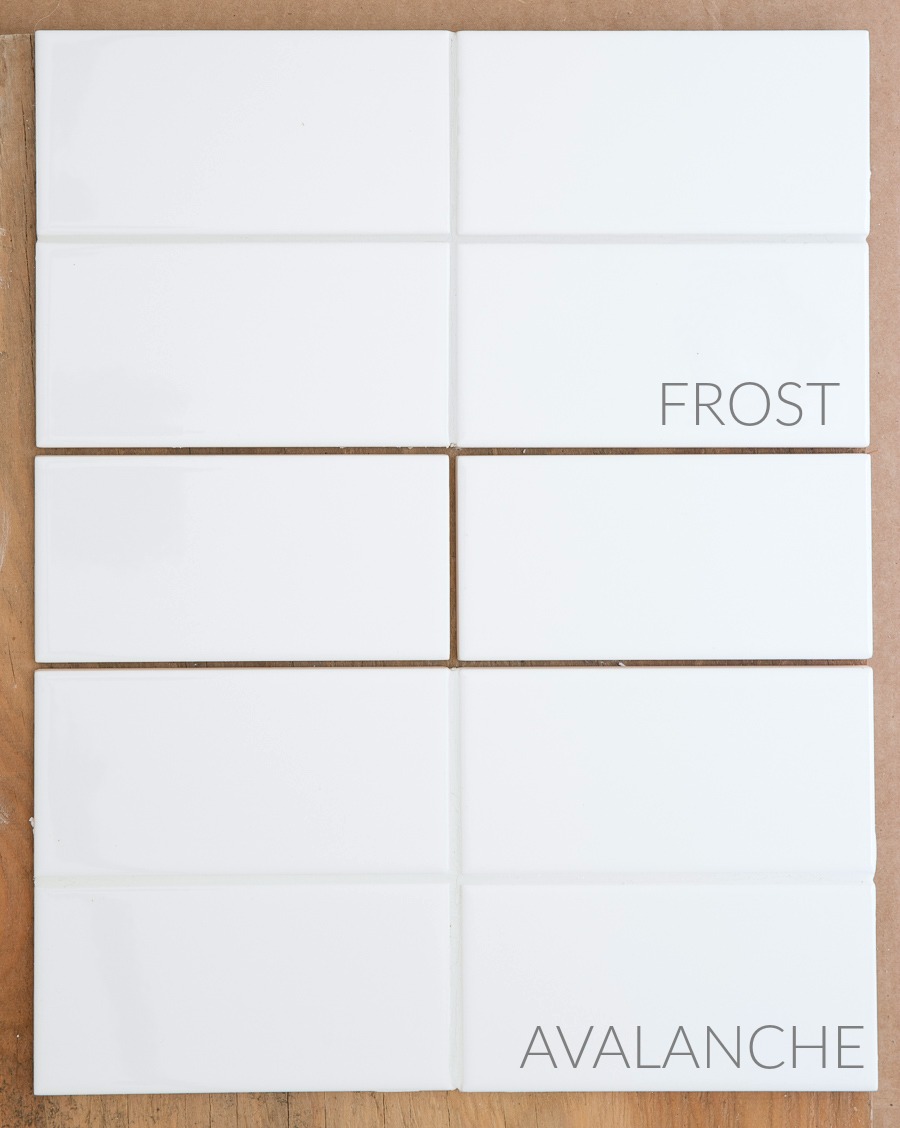
As you can see, when it's dry Mapei's Frost is just the lightest of grays (I show it here compared to Avalanche, which is a soft white) which you might not expect from the appearance of the grout when you mix it.
Once I made my sample boards and put my mosaic up next to them, the choice for my own kitchen was obvious – I wanted my mosaic to be the star of the show so I went with the lightest gray. But I did love several of the darker grays that I sampled too and would likely have chosen one of them if I had all subway tile with no mosaic. Here's a comparison of how the different grays I sampled looked against the white subway tile (the image is Pinnable for you to save for a later project when you might need it!):
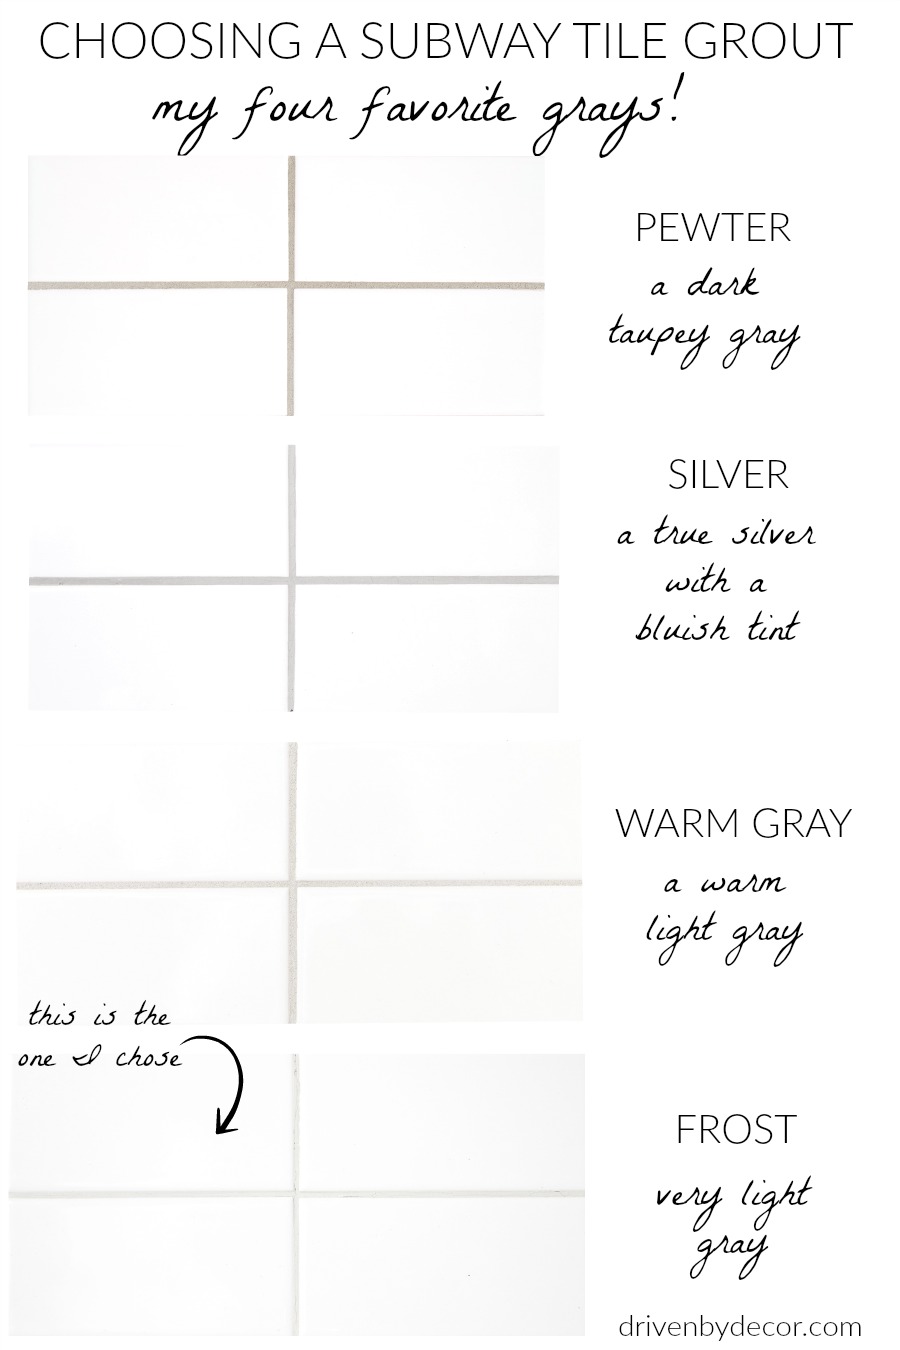
All of these are Mapei Keracolor grout – the same named grout might look totally different in a different brand so only use this as a guide to this specific brand! You can buy Mapei grout at Lowe's or order it online: unsanded Pewter {here} | unsanded Silver {here} | unsanded Warm Gray {here} | unsanded Frost {here} If you want to go for a darker gray, check out Mapei's Gray, Timberwolf, Iron, & Pearl Gray.
After Grouting, Seal It!
And one last thing I wanted to be sure to mention – definitely make sure your grout is sealed after your tile job is done! {This} impregnator penetrating sealer is more expensive than others but is the one that's been recommended as the best by every tile guy I've ever worked with.
Want to see more details of our kitchen? You can find the complete "before" and "after" post on our kitchen renovation {here}!

Here are a few of our kitchen sources, but for a full list of each and every one of them, see my kitchen renovation blog post!
Scroll & Click/Tap to Shop Our Kitchen:

Thanks as always for stopping by!

What Color Grout to Use With Gray Floor Tile
Source: https://www.drivenbydecor.com/white-subway-tile-gray-grout/